Homemade Vegan Pizza – Restaurant-Quality & Deliciously Plant-Based
Introduction
There’s something magical about pulling a steaming, golden-crusted pizza from your oven, knowing that every ingredient is plant-based and made with your own hands. The aroma of bubbling sauce, herbs, and perfectly charred crust fills your kitchen, and that first bite delivers everything you crave – crispy edges, chewy center, savory toppings, and creamy cheese-like richness without any dairy. Vegan pizza has evolved far beyond the sad, cheese-less pies of the past. Today’s plant-based pizzas rival any traditional pizzeria in flavor, satisfaction, and that irresistible comfort food quality that makes pizza universally beloved.
What makes homemade vegan pizza truly special is the complete control you have over every element. You choose the flour for your perfectly chewy crust, select the ripest tomatoes for vibrant sauce, and layer on whatever creative toppings inspire you. The cashew-based cheese melts beautifully, creating that satisfying stretch and creamy richness everyone loves. Whether you’re a longtime vegan, exploring plant-based eating, or simply looking to incorporate more vegetables and whole foods into your diet, homemade vegan pizza offers endless possibilities that actually taste better than delivery.
The beauty of this recipe lies in its accessibility and adaptability. With basic pantry ingredients and simple techniques, you can create restaurant-quality pizza that impresses vegans and non-vegans alike. Make it on busy weeknights using pre-prepped components, or turn pizza-making into a fun weekend activity with family or friends. From classic Margherita to creative combinations featuring seasonal vegetables, each pizza becomes an opportunity to celebrate plant-based eating without compromise or sacrifice. Once you’ve tasted homemade vegan pizza, you’ll never look at takeout the same way again.
Cultural Background and Context
Pizza’s origins trace back over 1,000 years to ancient civilizations around the Mediterranean, where flatbreads topped with oils, herbs, and whatever ingredients were available formed the basis of many meals. Modern pizza as we know it emerged in Naples, Italy, in the 18th century when tomatoes (initially thought poisonous in Europe) were finally embraced as a food. The classic Margherita pizza, created in 1889 for Queen Margherita of Savoy, featured tomato, mozzarella, and basil representing the colors of the Italian flag. This simple combination became the gold standard that pizza-making traditions would follow for over a century.
Pizza immigrated to America with Italian immigrants in the late 1800s, gaining popularity first in Italian communities and eventually becoming one of America’s most beloved foods by the mid-20th century. The development of pizza chains in the 1950s and 60s transformed it from an ethnic specialty into mainstream American cuisine. However, traditional pizza remained centered around dairy cheese and often meat toppings, making it inaccessible to those avoiding animal products.
The vegan pizza revolution began quietly in health food restaurants and vegan cafés in the 1980s and 90s, initially offering simple cheese-less versions that left much to be desired. The real transformation came in the 2010s when plant-based cheese technology advanced dramatically, creating products that actually melted, stretched, and tasted remarkably cheese-like. Home cooks discovered that cashew-based cheeses could replicate the creamy, savory qualities of dairy cheese when properly prepared. Today’s vegan pizza represents both honoring pizza’s humble flatbread origins and embracing modern innovation that makes plant-based eating delicious and accessible. Making vegan pizza at home connects us to centuries of pizza-making tradition while creating something entirely new and compassionate.
Health Benefits
Heart-Healthy Choice: Vegan pizza is naturally cholesterol-free and can be significantly lower in saturated fat compared to traditional pizza loaded with dairy cheese and processed meats. By using heart-healthy olive oil, loading up on vegetable toppings, and eliminating dairy, you create a meal that supports cardiovascular health rather than compromising it. The lycopene in tomato sauce provides additional heart protection, with studies showing that regular tomato consumption reduces the risk of heart disease and stroke.
Improved Digestion: When made with whole grain flour and topped with fiber-rich vegetables, vegan pizza supports digestive health in ways conventional pizza rarely achieves. The combination of complex carbohydrates, plant fiber from vegetables, and the absence of lactose (which many people struggle to digest) makes this pizza gentler on your digestive system. Each vegetable topping adds beneficial fiber that feeds healthy gut bacteria, promoting optimal digestion and regular bowel movements.
Enhanced Nutrient Density: Vegan pizza topped with colorful vegetables, leafy greens, mushrooms, and legumes delivers an impressive array of vitamins, minerals, and phytonutrients. Bell peppers provide vitamin C and antioxidants, spinach offers iron and folate, mushrooms deliver B vitamins and selenium, and tomatoes supply lycopene. Each topping contributes unique nutritional benefits, transforming pizza from empty calories into a nutrient-dense meal. The cashew-based cheese adds protein, healthy fats, and minerals including magnesium and zinc.
Blood Sugar Balance: Homemade vegan pizza using whole grain flour and protein-rich toppings provides a more balanced glycemic response compared to traditional white-flour pizza with fatty cheese. The fiber content from whole grains and vegetables slows digestion, preventing blood sugar spikes and crashes. Adding protein-rich ingredients like beans, tofu, or nut-based cheese further stabilizes blood sugar, providing sustained energy rather than the sluggish feeling that often follows conventional pizza.
Weight Management Support: Plant-based pizza can be surprisingly satisfying while containing fewer calories than cheese-heavy traditional versions. The high water and fiber content of vegetable toppings increases volume and satiety, helping you feel full with appropriate portions. By eliminating calorie-dense dairy cheese and processed meats, you significantly reduce the caloric density while maintaining or even increasing the actual amount of food on your pizza. This makes vegan pizza a weight-loss-friendly option when made thoughtfully.
Anti-Inflammatory Properties: Many vegetables used as pizza toppings contain powerful anti-inflammatory compounds. Tomatoes provide lycopene, garlic offers allicin, olive oil contains oleocanthal, and leafy greens supply various antioxidants – all working together to combat oxidative stress and chronic inflammation in your body. This anti-inflammatory effect may help reduce the risk of chronic diseases including arthritis, diabetes, and certain cancers.
Reduced Environmental Impact: While not a direct health benefit, choosing vegan pizza significantly reduces your environmental footprint compared to traditional pizza with dairy cheese and meat. Plant-based ingredients require dramatically less water, land, and energy to produce while generating fewer greenhouse gas emissions. This creates a healthier planet for future generations – the ultimate long-term health benefit.
Calorie and Macronutrient Information: Two slices of homemade vegan pizza (based on a 12-inch pizza cut into 8 slices) contains approximately 300-400 calories depending on toppings, providing a moderate-calorie meal that’s satisfying without being excessive. The macronutrient breakdown includes roughly 45-55g carbohydrates, 10-15g protein, and 10-15g fat (primarily healthy unsaturated fats from olive oil and cashews), creating a reasonably balanced meal that provides energy and satisfaction.
Ingredients
For the Pizza Dough (Makes 2 large 12-inch pizzas):
Dry Ingredients:
- 3½ cups (440g) all-purpose flour or bread flour (or 2 cups all-purpose + 1½ cups whole wheat flour for more nutrition)
- 1 packet (2¼ teaspoons or 7g) active dry yeast
- 1½ teaspoons sea salt
Wet Ingredients:
- 1⅓ cups (320ml) warm water (110°F/43°C)
- 1 teaspoon organic cane sugar or maple syrup
- 2 tablespoons extra virgin olive oil
For the Pizza Sauce (Makes enough for 2-3 pizzas):
- 1 can (28 oz/794g) crushed tomatoes or tomato puree
- 3 cloves garlic, minced
- 2 tablespoons tomato paste
- 1 tablespoon extra virgin olive oil
- 1 teaspoon dried oregano
- 1 teaspoon dried basil
- ½ teaspoon sea salt
- ¼ teaspoon black pepper
- ¼ teaspoon red pepper flakes (optional)
- Pinch of sugar (optional, to balance acidity)
For Cashew Cheese (Makes about 1 cup):
- 1 cup (140g) raw cashews, soaked in hot water for 30 minutes
- ¼ cup (60ml) water
- 2 tablespoons nutritional yeast
- 1 tablespoon fresh lemon juice
- ½ teaspoon garlic powder
- ¼ teaspoon sea salt
- ⅛ teaspoon onion powder (optional)
For Classic Vegetable Topping Combination:
Vegetables:
- 2 cups (150g) sliced mushrooms (cremini or button)
- 1 large bell pepper (any color), thinly sliced
- 1 small red onion, thinly sliced
- 2 cups (60g) fresh baby spinach or arugula
- 1 cup (150g) cherry tomatoes, halved
- ½ cup (75g) pitted black or Kalamata olives, sliced
Optional Additional Toppings:
- 1 cup (150g) small broccoli florets, lightly steamed
- 1 can (14 oz) artichoke hearts, drained and quartered
- Fresh basil leaves (added after baking)
- Roasted garlic cloves
- Sliced jalapeños
- Capers
- Vegan pepperoni or sausage crumbles
- Sun-dried tomatoes
- Fresh arugula (added after baking)
For Finishing:
- Extra virgin olive oil for drizzling
- Fresh basil leaves, torn
- Red pepper flakes
- Coarse sea salt
- Balsamic glaze (optional)
Instructions
Step 1: Activate Your Yeast
In a small bowl, combine the warm water with sugar and gently stir to dissolve. Sprinkle the yeast over the surface of the water without stirring and let it sit undisturbed for 5-10 minutes. During this time, the yeast will “wake up” and begin feeding on the sugar, creating foam and bubbles on the surface.
This proofing step is crucial – if your yeast doesn’t foam and become fragrant, it’s not active (possibly too old or the water temperature was wrong) and your dough won’t rise properly. The water temperature is critical: too hot (above 120°F) kills the yeast, too cold (below 100°F) and it won’t activate. Use an instant-read thermometer if unsure, or test the water on your wrist – it should feel comfortably warm, like bathwater.
Step 2: Make the Dough
In a large mixing bowl, whisk together the flour and salt, ensuring they’re evenly combined. Create a well in the center of the flour mixture and pour in the activated yeast mixture (it should be foamy and smell yeasty) along with the olive oil. Using a wooden spoon or your hands, mix everything together, starting from the center and gradually incorporating flour from the sides. Continue mixing until a shaggy, rough dough forms with no dry flour remaining. The dough will look messy and uneven at this stage – that’s completely normal.
Turn the dough out onto a lightly floured work surface and begin kneading. Use the heel of your hand to push the dough away from you, fold it back over itself, rotate a quarter turn, and repeat. Knead for 8-10 minutes until the dough becomes smooth, elastic, and slightly tacky but not sticky. This kneading develops the gluten structure that gives pizza crust its characteristic chew. You’ll know it’s ready when the dough bounces back when poked and has a smooth, silky surface.
Step 3: First Rise
Lightly oil a large bowl with olive oil (about 1 teaspoon), place your kneaded dough inside, and turn it once so all surfaces are lightly coated with oil. This prevents the dough from drying out and sticking to the bowl during rising. Cover the bowl with a damp kitchen towel or plastic wrap and place in a warm, draft-free location for 1 to 1½ hours, or until the dough has doubled in size. Ideal rising temperatures are 75-80°F (24-27°C).
If your kitchen is cool, try placing the bowl in an oven with just the light on (don’t turn on the heat!), near a sunny window, or on top of your refrigerator where it’s slightly warmer. This rising period, called fermentation, is where flavor develops and the texture transforms from dense and heavy to light and airy. Don’t rush this step – proper fermentation is key to great-tasting pizza crust.
Step 4: Prepare Your Sauce
While the dough rises, prepare your pizza sauce. Heat the olive oil in a medium saucepan over medium heat. Add the minced garlic and sauté for 30-60 seconds, stirring constantly, until fragrant but not browned (burnt garlic tastes bitter). Immediately add the crushed tomatoes, tomato paste, oregano, basil, salt, pepper, and red pepper flakes if using. Stir everything together and bring to a gentle simmer.
Reduce heat to low and let the sauce simmer uncovered for 15-20 minutes, stirring occasionally, until it thickens noticeably and the raw tomato taste mellows into a sweet, concentrated flavor. Taste and adjust seasonings – if the sauce tastes too acidic, add a pinch of sugar to balance it. Let the sauce cool to room temperature before using on your pizza. Hot sauce can make the dough soggy and prevent proper cooking. The sauce can be made up to 5 days ahead and refrigerated, or frozen for up to 3 months.
Step 5: Create Vegan Cashew Cheese
Drain your soaked cashews thoroughly, discarding the soaking water. Place the drained cashews in a high-speed blender (a regular blender may not get the mixture completely smooth) along with the fresh water, nutritional yeast, lemon juice, garlic powder, salt, and onion powder if using. Blend on high speed for 2-3 minutes, stopping occasionally to scrape down the sides with a spatula, until the mixture is completely smooth and creamy with no graininess remaining. The consistency should be thick but pourable, similar to a thick smoothie or pancake batter.
If it’s too thick to blend properly, add water one tablespoon at a time until the blender can process it smoothly. This cashew cheese will firm up slightly when baked, creating that desirable melted cheese appearance and creamy texture. For best flavor, make this at least 30 minutes before using to allow flavors to meld. It can be made up to 5 days ahead and refrigerated.
Step 6: Preheat Oven and Prepare Baking Surface
About 30 minutes before you’re ready to bake, preheat your oven to its highest setting – usually 475-500°F (245-260°C). The high heat is essential for achieving that crispy, slightly charred crust characteristic of pizzeria pizza. If you have a pizza stone, place it on the lowest oven rack during preheating. A properly preheated pizza stone replicates the intense bottom heat of professional pizza ovens.
If you don’t have a pizza stone, flip a large rimmed baking sheet upside down and preheat it instead – using the flat underside makes it easier to slide your pizza on and off. While the oven preheats, prepare all your toppings by slicing vegetables uniformly so they cook evenly. Pre-cook any vegetables that release a lot of moisture (like mushrooms or zucchini) by quickly sautéing them.
Step 7: Shape Your Pizza Dough
Once your dough has doubled in size, punch it down gently to release the gas bubbles. Turn it out onto a lightly floured work surface and divide it in half using a sharp knife or dough scraper. Each half makes one 12-inch pizza. Shape one portion into a ball by pulling the edges underneath, creating surface tension. Let the dough balls rest for 5-10 minutes covered with a towel – this relaxation makes stretching easier.
To shape, place one dough ball on a lightly floured surface or sheet of parchment paper. Using your fingertips, press down gently from the center outward, leaving a slightly thicker border around the edge for the crust. Continue pressing and stretching, working in a circle, until you have a roughly 12-inch round. Avoid using a rolling pin if possible – it deflates those beautiful air pockets created during rising. If the dough resists and springs back, let it rest for another 5 minutes and try again.
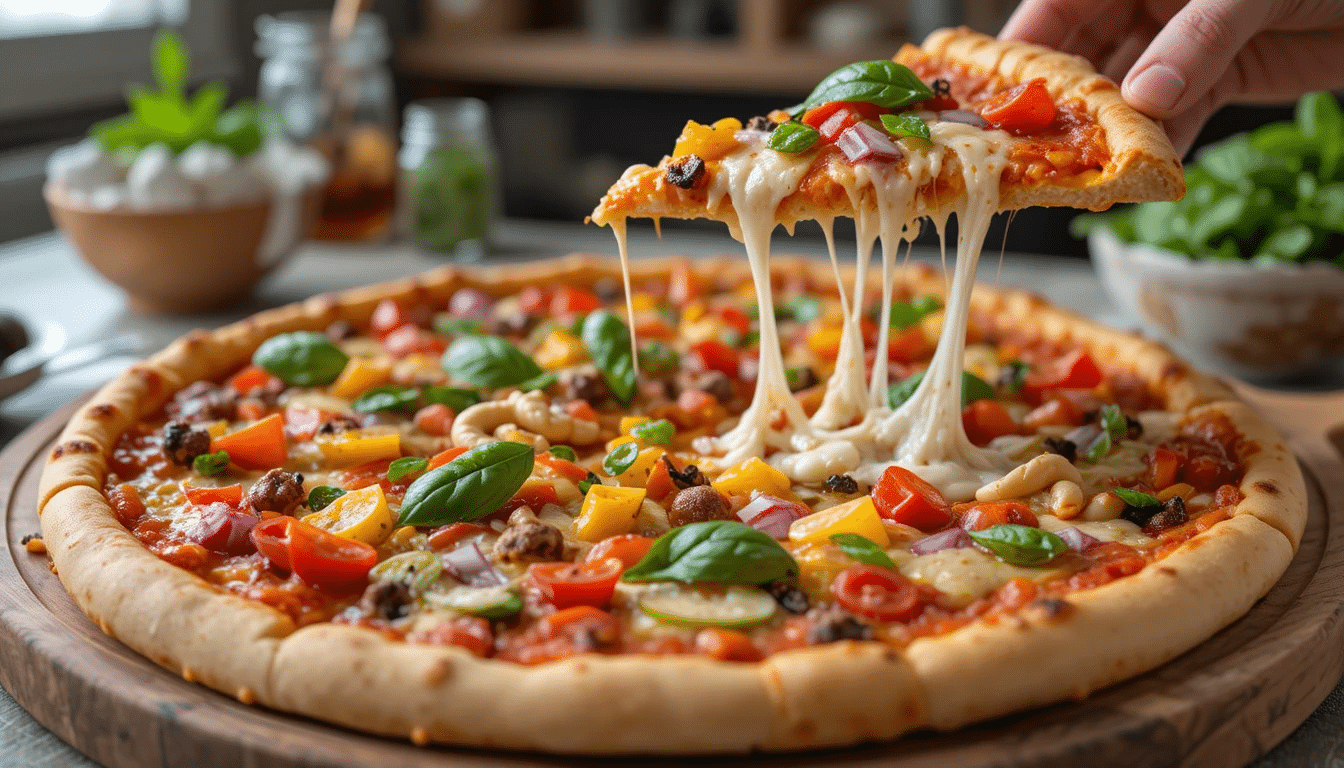
Step 8: Assemble Your Pizza
Transfer your shaped dough to a piece of parchment paper if it isn’t already on one (parchment makes transferring to the hot baking surface much easier). Working quickly so the dough doesn’t get soggy, spread about ⅓ cup of sauce over the surface, leaving a ½-inch border around the edges for the crust. Use the back of a spoon or ladle to spread the sauce in a thin, even layer – less is more with sauce.
Add your toppings strategically: start with heavier items that take longer to cook (like mushrooms and bell peppers), then drizzle or dollop the cashew cheese using a spoon or squeeze bottle, and finish with delicate items that cook quickly (like spinach or fresh tomatoes). Don’t overload the pizza with too many toppings – this is a common mistake that results in soggy centers and undercooked crusts. Three to four toppings is ideal.
Step 9: Bake to Perfection
Carefully slide the parchment paper with your assembled pizza onto the preheated pizza stone or inverted baking sheet. If you’re confident, you can also use a pizza peel dusted with cornmeal or flour. Bake for 12-15 minutes, watching carefully, until the crust is golden brown with slightly charred spots around the edges and the bottom is crisp. The exact timing depends on your oven and how thick you stretched the dough.
Rotate the pizza halfway through baking if your oven has hot spots. You’ll know it’s done when the crust is firm enough to hold its shape when lifted and the edges have those desirable dark spots. If the toppings are browning too quickly but the crust isn’t done, reduce the oven temperature by 25°F for the final few minutes.
Step 10: Rest, Finish, and Serve
Remove the pizza from the oven using oven mitts and a pizza peel or large spatula. Transfer to a cutting board and let it rest for 2-3 minutes before slicing. This brief resting period allows the toppings to set slightly, the cheese to firm up, and makes cutting much cleaner. It also prevents burning your mouth on molten-hot toppings! While the pizza rests, prepare your finishing touches.
Drizzle with a small amount of high-quality extra virgin olive oil, scatter fresh torn basil leaves over the top, sprinkle with red pepper flakes if you like heat, and finish with a light sprinkle of coarse sea salt. These final touches add layers of fresh flavor and professional presentation. Cut into 6-8 slices using a sharp pizza cutter or large chef’s knife, using a rocking motion rather than pressing straight down. Serve immediately while the crust is crispy and the toppings are warm.
Ingredient Deep Dive
The type of flour you choose dramatically impacts your pizza crust’s texture and flavor. All-purpose flour creates a tender, softer crust with moderate chew – perfect for those who prefer a less chewy texture. Bread flour, with its higher protein content (12-14% versus 10-12% in all-purpose), develops more gluten and creates a chewier, more substantial crust that better replicates professional pizzeria pizza.
For added nutrition and a slightly nutty flavor, substitute half the white flour with whole wheat flour. This adds fiber and minerals while maintaining decent texture. “00” flour, an Italian flour milled to superfine consistency, creates the silkiest, most authentic Neapolitan-style crust, though it’s more expensive and requires seeking out specialty stores. For gluten-free pizza, use a commercial gluten-free flour blend specifically designed for pizza or bread – results vary significantly by brand, so experiment to find one you like.
Yeast selection matters more than many people realize. Active dry yeast (the most common type) requires activation in warm water before use, as described in this recipe. Instant yeast can be mixed directly into flour without activation, speeds fermentation slightly, and often produces more consistent results. Fresh yeast (also called cake yeast or compressed yeast) provides the best flavor and rise but requires refrigeration and expires quickly. For long-term storage, keep yeast in the freezer in an airtight container – it lasts indefinitely when frozen. Always check the expiration date on yeast packages, as old yeast loses potency and won’t make your dough rise properly.
The cashew cheese in this recipe can be adapted numerous ways. For a sharper, more “aged” cheese flavor, add 1 tablespoon of white miso paste. For a creamier, richer version, replace some of the water with canned coconut cream. To create a stretchy, melty cheese that browns beautifully, add 2 tablespoons of tapioca starch (mix it with the water first to prevent clumping) – the starch gelatinizes when heated, creating that characteristic cheese stretch. For nut-free versions, substitute sunflower seeds for cashews (soak them longer, 2-4 hours, and strain well as they release a slightly bitter liquid when soaked). Store-bought vegan mozzarella also works if you prefer convenience over homemade, though quality and price vary dramatically by brand.
Customization Options
International Pizza Variations
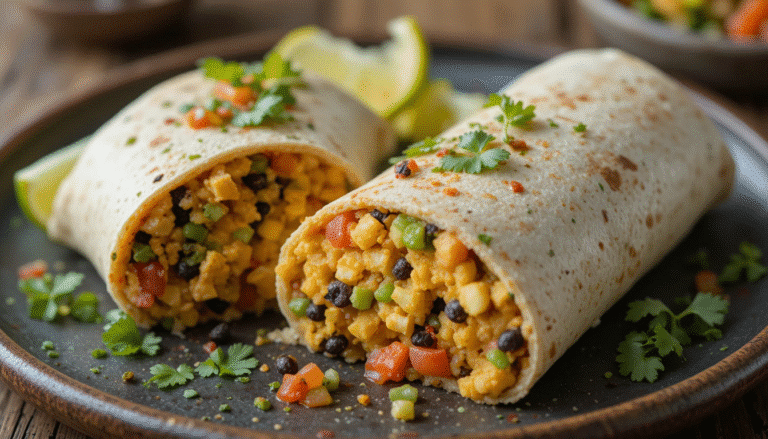
Transform your pizza with globally-inspired flavor combinations that showcase different cuisines. For Mediterranean pizza, use olive oil instead of tomato sauce as the base, then top with roasted red peppers, sun-dried tomatoes, Kalamata olives, artichoke hearts, capers, and fresh oregano. Finish with arugula and a balsamic glaze drizzle after baking. Create Thai-inspired pizza by using peanut sauce as the base, topping with sautéed vegetables (bell peppers, carrots, purple cabbage), crispy tofu, crushed peanuts, and fresh cilantro with a squeeze of lime after baking.
Make Mexican pizza by spreading refried beans as the base, adding corn, black beans, jalapeños, red onion, and cashew queso. After baking, top with fresh cilantro, diced tomatoes, sliced avocado, and a drizzle of cashew sour cream. For Indian-inspired pizza, use tikka masala sauce as the base, top with tandoori-spiced cauliflower, red onion, bell peppers, and cashew cream. Finish with fresh cilantro and a sprinkle of garam masala. Japanese-style pizza features teriyaki sauce, shiitake mushrooms, edamame, scallions, and sesame seeds with a drizzle of spicy mayo after baking.
Specialty Crust Variations
Once you’ve mastered basic pizza dough, experiment with different crust styles and flavors. Create garlic herb crust by mixing 2 tablespoons of dried Italian herbs and 1 tablespoon of garlic powder into your flour. Make whole wheat sourdough pizza by replacing the yeast with 1 cup of active sourdough starter and adjusting liquid accordingly – this creates complex flavor and improved digestibility. Try cauliflower crust for a low-carb option by mixing riced cauliflower with flax eggs and nutritional yeast, though the texture differs significantly from traditional dough.
Gluten-free pizza crust uses specialized flour blends and benefits from added xanthan gum for structure. For thin, cracker-like crust, roll the dough very thin and bake at even higher temperatures (500°F+) for shorter times. Create stuffed crust by rolling vegan mozzarella sticks or cashew cheese in the edges before folding them over and sealing. Make focaccia-style deep dish pizza using a cast iron skillet, more olive oil, and thicker dough that rises again in the pan before topping.
Serving Suggestions
Vegan pizza shines as the centerpiece of casual gatherings, family dinners, or solo comfort food nights. Serve it straight from the oven on a large wooden cutting board or pizza peel for rustic, family-style presentation. Cut into traditional wedge slices for handheld eating, or slice into squares (also called “tavern-style” or “party cut”) for easier sharing and portion control. For elegant entertaining, create individual personal pizzas using smaller dough portions, allowing guests to customize their own creations.
Complement your pizza with sides that balance richness and provide textural contrast. A fresh Caesar salad with cashew-based dressing offers cool, crisp contrast to hot, savory pizza. Garlic knots made from extra dough brushed with garlic-herb oil become irresistible appetizers. Marinated olives and roasted red peppers serve as antipasti before the main event. For heartier appetites, roasted vegetables like Brussels sprouts or broccolini seasoned with lemon and garlic round out the meal.
Beverage pairings elevate the pizza experience from casual to special. Italian sparkling water with lemon cleanses the palate between bites. Light red wines like Chianti or Pinot Noir complement tomato-based pizzas beautifully, while crisp white wines like Pinot Grigio work well with white or pesto pizzas. For non-alcoholic options, try Italian sodas, kombucha, or fresh-pressed juice. Craft beer, especially hoppy IPAs or malty amber ales, pairs wonderfully with rich, vegetable-laden pizzas.
Create an interactive pizza party by setting up a DIY pizza bar. Provide individual dough portions and bowls of various toppings, sauces, and vegan cheeses, allowing guests to create personal pizzas baked to order. This works especially well with children, who love the hands-on creativity. For movie nights or game days, cut pizzas into smaller appetizer-sized pieces and serve with various dipping sauces – marinara, garlic aioli, ranch, or pesto.
Variations
Once you’ve mastered classic vegan pizza, endless creative variations await. White pizza eliminates tomato sauce entirely, using a garlic-olive oil base instead. Sauté 4-5 cloves of minced garlic in ¼ cup olive oil until fragrant, brush this over your dough, then top with cashew ricotta (blend cashews with lemon juice, nutritional yeast, fresh basil, and salt for a ricotta-like consistency), caramelized onions, roasted garlic cloves, and fresh rosemary. Finish with arugula and a drizzle of balsamic reduction after baking for sophisticated flavors.
BBQ pizza uses tangy barbecue sauce as the base instead of marinara. Top with BBQ-seasoned chickpeas, red onion, bell peppers, corn, cashew cheese, and fresh cilantro after baking. For breakfast pizza, use the same dough but top with cashew ricotta, roasted cherry tomatoes, sautéed mushrooms, spinach, and a tofu scramble seasoned with turmeric and black salt. Finish with fresh chives and everything bagel seasoning for a savory morning meal.
Pesto pizza features basil pesto (ensure it’s dairy-free by using nutritional yeast instead of Parmesan) as the sauce, topped with sun-dried tomatoes, artichoke hearts, pine nuts, and cashew mozzarella. After baking, add fresh arugula and a drizzle of balsamic glaze. Create dessert pizza by brushing dough with melted coconut oil mixed with cinnamon and sugar, baking until golden, then topping with cashew cream cheese sweetened with maple syrup, fresh berries, and a chocolate drizzle. This transforms pizza night into a complete meal including dessert.
For seasonal variations, create autumn pizza with roasted butternut squash, caramelized onions, sage, and cashew béchamel. Make summer pizza with fresh tomatoes, basil, garlic, and a white bean spread. Winter pizza features roasted Brussels sprouts, red onion, dried cranberries, and balsamic glaze. Spring pizza showcases asparagus, peas, leeks, and lemon-herb cashew cheese. Adapting to seasonal produce ensures the freshest flavors and supports local agriculture.
Storage and Meal Prep
Unbaked pizza dough is incredibly freezer-friendly and perfect for meal prep. After the first rise, divide the dough into individual pizza portions and shape into smooth balls. Place each dough ball in a lightly oiled freezer bag or wrap tightly in plastic wrap followed by foil. Label with the date and freeze for up to 3 months. To use, transfer to the refrigerator 24 hours before needed, allowing slow thawing that continues flavor development. Bring to room temperature for 30 minutes before shaping. This make-ahead strategy means fresh pizza dough is always available with minimal weeknight effort.
Pizza sauce freezes beautifully for up to 6 months. Make large batches when tomatoes are in season and freeze in portion-sized containers (½ cup per container provides enough for one pizza). Thaw overnight in the refrigerator or quickly in a saucepan over low heat. The cashew cheese also freezes well for up to 2 months, though the texture may separate slightly upon thawing – whisk vigorously or blend briefly to restore smoothness.
Baked pizza stores in the refrigerator for 3-4 days in an airtight container or wrapped tightly in aluminum foil. Never refrigerate pizza in cardboard boxes, which absorb moisture and make the crust soggy. To reheat, avoid the microwave which creates rubbery crust. Instead, reheat in a 400°F oven for 5-8 minutes until crispy and hot, or use a skillet method: place pizza slices in a dry skillet over medium heat, cover, and heat for 3-5 minutes until the bottom is crispy and the toppings are hot. This restores much of the original texture.
For freezing baked pizza, cool completely, then wrap individual slices tightly in plastic wrap followed by foil, or layer slices with parchment paper between them in a freezer container. Frozen baked pizza keeps for up to 2 months. Reheat directly from frozen in a 375°F oven for 12-15 minutes or until heated through and crispy. This is perfect for quick future meals or using up leftover pizza before it goes bad.
Common Mistakes to Avoid
Using Wrong Water Temperature: This is the most common mistake that prevents dough from rising properly. Water that’s too hot (above 120°F) kills yeast instantly, while water that’s too cold (below 100°F) won’t activate it. Invest in an instant-read thermometer, or test water on your wrist – it should feel comfortably warm but not hot, like bathwater. If you accidentally use water that’s too hot, you’ll need to start over with fresh yeast.
Over-Flouring Work Surface: Adding too much flour when kneading or shaping makes dough tough and dry. Use only enough flour to prevent sticking – the dough should feel slightly tacky but not sticky. If your dough seems very sticky, it’s better to let it rest for 5 minutes (allowing flour to hydrate fully) than to add more flour immediately. Dust off any excess flour from your shaped pizza before adding toppings.
Skipping Preheating Time: Inadequate oven preheating is a critical mistake that prevents achieving crispy crusts. Your oven and baking surface (stone or inverted sheet) need a full 30 minutes at maximum temperature to store enough heat. When you add the pizza, this stored heat creates the intense bottom heat necessary for crispy, properly cooked crust. Rushing this step results in pale, soft, disappointing crust.
Overloading with Toppings: More isn’t always better with pizza. Too many toppings prevent the crust from cooking properly, create a soggy center, and cause toppings to slide off. Limit yourself to 3-4 toppings plus sauce and cheese. Use restraint – you should see crust peeking through between toppings. Remember that restaurants use far fewer toppings than most home cooks assume.
Using Wet Vegetables: Vegetables with high water content (mushrooms, zucchini, tomatoes) release moisture during cooking, which can make your pizza soggy. Always pre-cook mushrooms and zucchini briefly to remove excess moisture, pat fresh tomatoes dry with paper towels, and avoid using frozen vegetables that haven’t been thawed and drained. This simple step dramatically improves crust quality.
Not Resting Dough: When dough resists stretching and keeps springing back, don’t fight it. This means the gluten needs to relax. Cover the dough and let it rest for 5-10 minutes, then try again. Forcing resistant dough results in uneven thickness, tears, and frustration. Patience always wins with pizza dough.
Cutting Immediately: Slicing into pizza the moment it comes from the oven causes toppings to slide off and burns your mouth. The 2-3 minute rest allows the cheese to firm slightly, toppings to settle, and prevents burnt tongues. Use this time to prepare plates and beverages instead of hovering with the pizza cutter.
Shopping Guide
Most pizza ingredients are affordable pantry staples available at any grocery store. Buy flour in bulk from warehouse stores or the bulk section of natural food stores for significant savings. A 5-pound bag of all-purpose or bread flour costs $3-6 and makes 6-8 pizzas. Store flour in an airtight container in a cool, dry place for up to 8 months, or freeze for longer storage. Yeast packets are inexpensive (usually $1-2 for three packets), but buying a 4-ounce jar provides better value for regular pizza makers. Store opened yeast in the freezer for maximum shelf life.
For tomatoes, canned crushed tomatoes or tomato puree provide the best value and consistent quality year-round. San Marzano tomatoes from Italy are considered the gold standard for pizza sauce, offering sweet flavor and low acidity, though they cost more. Store brands work perfectly fine for budget-conscious cooks. A 28-ounce can costs $1-3 depending on quality and makes sauce for 2-3 pizzas.
Raw cashews are the priciest ingredient in this recipe but create superior vegan cheese compared to alternatives. Buy them in bulk from warehouse stores, natural food stores, or online for the best prices. A pound of raw cashews costs $8-15 depending on whether they’re conventional or organic. Store cashews in the freezer to prevent rancidity – they last indefinitely when frozen. One pound makes approximately 4 cups of cashew cheese, enough for 8-12 pizzas, calculating to roughly $1-2 per pizza.
Nutritional yeast, essential for cheesy flavor, is found in the health food section or near spices. Bob’s Red Mill and Bragg are popular brands. A canister costs $8-12 and lasts for months of regular use. For vegetables, buy whatever is in season and on sale for the best prices and flavor. Bell peppers, onions, and mushrooms are versatile, affordable toppings available year-round. Consider growing fresh herbs like basil in a windowsill pot – a $3 plant provides fresh basil for months.
Nutritional Information (Per Serving)
- Prep Time: 2 hours (including rising time)
- Cook Time: 15 minutes per pizza
- Total Time: 2 hours 15 minutes
- Servings: 2 large 12-inch pizzas (each serves 3-4 people, 16 slices total)
- Calories: 285 kcal per 2 slices (⅛ of one pizza)
- Protein: 9g
- Carbohydrates: 44g
- Fat: 8g
- Fiber: 3g
- Sugar: 4g (naturally occurring)
- Sodium: 480mg
- Calcium: 45mg
- Iron: 3mg
- Vitamin C: 25mg
- Vitamin A: 850 IU