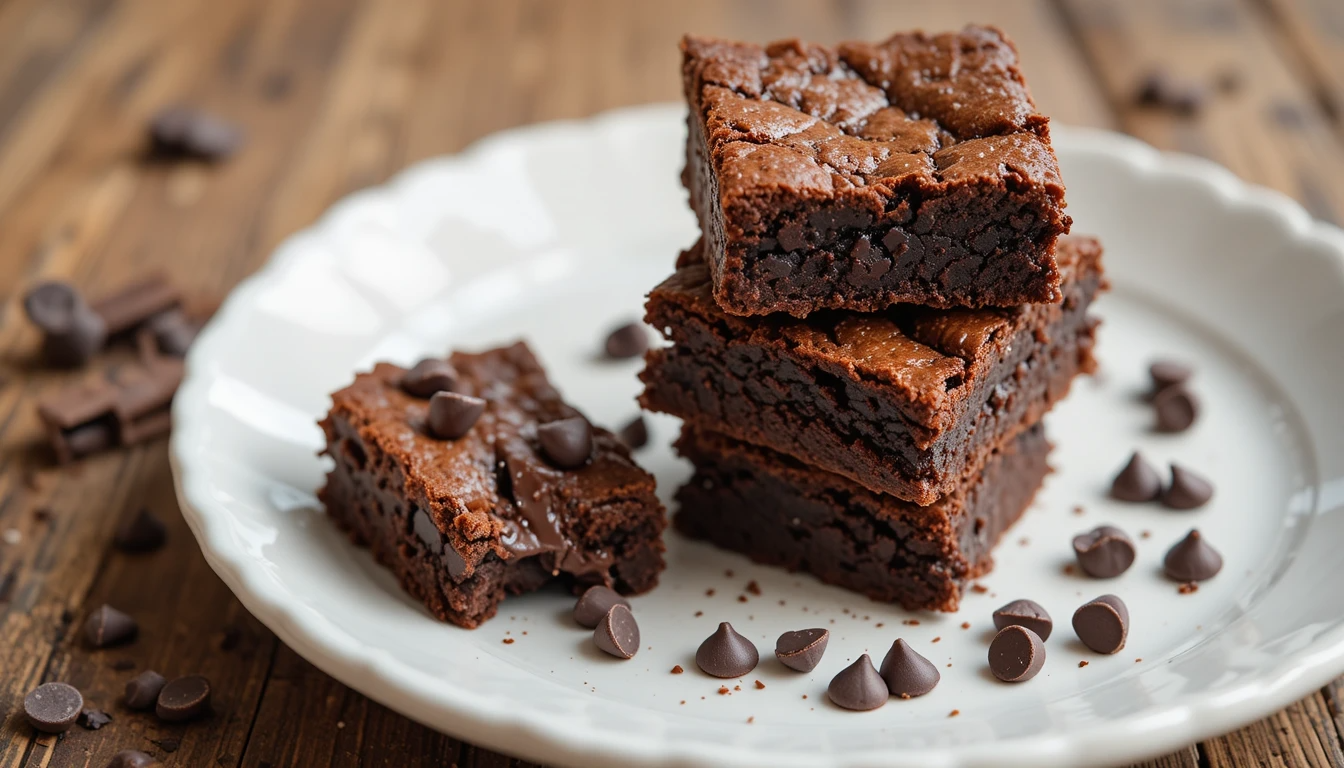
The Best Fudgy Vegan Brownies – Rich, Decadent & Egg-Free
Table of Contents
Introduction
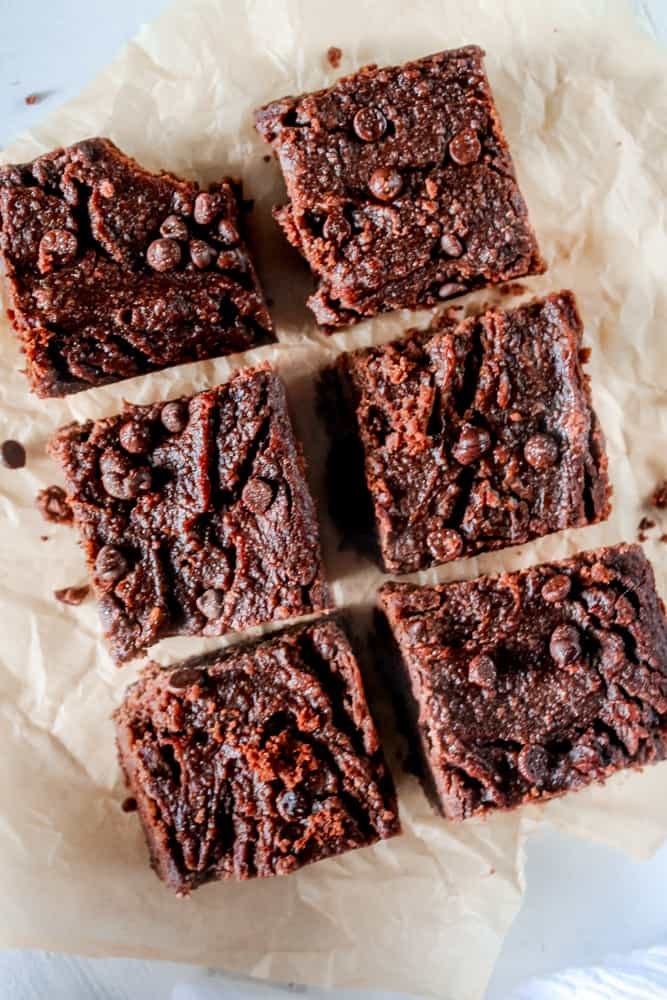
Imagine biting into a brownie so rich, fudgy, and intensely chocolatey that it’s almost indecent – the kind with that perfect crackly top, gooey center, and deep chocolate flavor that makes your eyes roll back with pure bliss. These vegan brownies deliver exactly that experience without a single egg, drop of dairy, or moment of compromise, proving once and for all that plant-based baking isn’t about substitution or sacrifice but about creating desserts so incredible that nobody – vegan or not – can resist going back for seconds. Whether you’re a longtime vegan, baking for someone with dietary restrictions, or simply craving the ultimate chocolate fix, this recipe produces bakery-quality brownies with that coveted fudgy texture, shiny crackly top, and intense chocolate depth that makes brownies one of the world’s most beloved desserts, all while being completely plant-based, surprisingly simple to make, and ready to devour in under an hour.
Cultural Background and Context
Brownies are a distinctly American invention, first appearing in the late 19th century, though their exact origins remain debated culinary folklore. Some food historians credit Fannie Farmer’s 1896 Boston Cooking-School Cook Book with the first published brownie recipe, while others point to a Palmer House Hotel creation from 1893 for the Chicago World’s Fair. Early brownies were more cake-like and often contained molasses or no chocolate at all, bearing little resemblance to today’s fudgy chocolate squares. The transformation into chocolate-forward, fudgy treats happened gradually through the early 20th century as chocolate became more accessible and affordable.
By the 1920s and 1930s, brownies had evolved into the chocolate dessert we recognize today, with recipes increasingly featuring cocoa powder or melted chocolate as the star ingredient. The introduction of Baker’s Chocolate’s brownie recipe on their packaging in the 1930s standardized the dessert in American homes. Brownies became beloved for their simplicity – requiring just one bowl, basic pantry ingredients, and minimal technique – making them accessible to home bakers of all skill levels. Their dense, fudgy texture and intense chocolate flavor made them the perfect handheld dessert for lunchboxes, bake sales, and casual entertaining.
The vegan adaptation of brownies represents one of plant-based baking’s greatest successes. Traditional brownies rely heavily on eggs for structure and butter for richness, but vegan bakers discovered that ground flaxseed or chia seeds combined with water create “flax eggs” that bind ingredients effectively, while vegetable oil, coconut oil, or vegan butter provide necessary fat and moisture. The breakthrough came with understanding that slightly underbaking creates that coveted fudgy texture, while proper ratios of flour to fat to chocolate ensure brownies are dense and moist rather than dry or cakey. Today’s vegan brownies often surpass traditional versions in richness and chocolate intensity, with aquafaba (chickpea brine), applesauce, or plant-based yogurt sometimes used for extra moisture and binding. The result is a brownie that honors the American classic while being entirely plant-based, often healthier, and in many cases, more decadent than the original.
Health Benefits
Heart-Healthy Chocolate: Dark chocolate and cocoa powder contain powerful flavonoids and antioxidants that support cardiovascular health by improving blood flow, reducing blood pressure, and lowering LDL (bad) cholesterol. The higher the cocoa content, the more beneficial compounds you receive. Vegan brownies made with quality dark chocolate provide these heart-protective benefits without the cholesterol found in egg-based versions. Studies show that moderate dark chocolate consumption may reduce heart disease risk by up to 37%.
Cholesterol-Free Indulgence: Unlike traditional brownies loaded with eggs (one egg contains 186mg cholesterol) and butter (high in saturated fat), vegan brownies are completely cholesterol-free. This makes them a guilt-reduced treat for those managing cholesterol levels or following heart-healthy diets. The absence of animal products significantly reduces saturated fat while maintaining that rich, indulgent texture everyone craves in brownies.
Antioxidant Powerhouse: Cocoa powder is one of the richest sources of antioxidants on the planet, containing more antioxidant activity per gram than blueberries, green tea, or red wine. These antioxidants, particularly flavonols, fight free radicals, reduce inflammation, and may protect against cellular damage. Dark chocolate also contains minerals including iron, magnesium, copper, and manganese. The darker and less processed the chocolate, the more antioxidants and minerals it provides.
Mood-Boosting Properties: Chocolate contains several compounds that positively affect mood and brain function. It stimulates endorphin production (the brain’s feel-good chemicals), contains serotonin precursors that act as natural antidepressants, and includes small amounts of caffeine and theobromine that provide gentle energy and mental alertness. The phenylethylamine in chocolate creates feelings of happiness and well-being. This explains why chocolate is so effective as comfort food – there’s actual science behind those cravings.
Improved Digestion: Many vegan brownie recipes incorporate fiber-rich ingredients like flaxseed, whole wheat flour, or oats that support digestive health. Flaxseed provides both soluble and insoluble fiber, promoting regular bowel movements and feeding beneficial gut bacteria. The absence of dairy also makes these brownies easier to digest for the 65% of the global population with some degree of lactose intolerance.
Blood Sugar Management: While brownies are still dessert and contain sugar, vegan versions often have a slightly lower glycemic impact than traditional brownies due to fiber from flax eggs and the absence of refined dairy. Using coconut sugar, date paste, or reducing overall sugar can further moderate blood sugar response. Pairing brownies with protein (like nut butter) or eating after a balanced meal helps minimize blood sugar spikes.
Allergy-Friendly: Vegan brownies are naturally egg-free and dairy-free, making them safe for people with these common food allergies. They can easily be made gluten-free using gluten-free flour blends, and nut-free by using seed butter instead of nut butter if added. This inclusivity means one batch can satisfy various dietary restrictions without preparing multiple versions.
Calorie and Macronutrient Information: One standard brownie (about 2×2 inches) contains approximately 180-220 calories depending on size and add-ins, providing 24-28g carbohydrates, 3-4g protein, and 10-12g fat (primarily from healthy plant oils and chocolate). While still an indulgent treat, vegan brownies often contain 15-20% fewer calories than traditional versions due to eliminating butter and eggs.
Ingredients
For the Best Vegan Brownies (Makes 16 brownies):
For the Flax Eggs:
- 3 tablespoons ground flaxseed
- 9 tablespoons (135ml) water
- Let sit for 5 minutes to thicken
Dry Ingredients:
- 1 cup (125g) all-purpose flour (or gluten-free flour blend)
- ¾ cup (75g) unsweetened cocoa powder (Dutch-process or natural)
- 1½ cups (300g) granulated sugar (or coconut sugar)
- ½ teaspoon baking powder
- ½ teaspoon salt
- ¼ teaspoon espresso powder (optional but enhances chocolate flavor)
Wet Ingredients:
- ½ cup (120ml) vegetable oil, melted coconut oil, or melted vegan butter
- ½ cup (120ml) plant-based milk (almond, soy, or oat)
- 1 tablespoon vanilla extract
- ¼ cup (60ml) strong brewed coffee or water (coffee enhances chocolate)
For Extra Fudginess:
- ¾ cup (130g) vegan chocolate chips or chopped dark chocolate
- Optional: ½ cup (60g) chopped walnuts or pecans
For Optional Mix-Ins:
- ½ cup vegan chocolate chips
- ½ cup chopped nuts (walnuts, pecans, or almonds)
- ½ cup vegan peanut butter or almond butter (swirled on top)
- ½ cup vegan caramel sauce (swirled on top)
- ½ cup shredded coconut
- ½ cup dried cherries or raspberries
- 1 teaspoon peppermint extract (for mint brownies)
For Frosting (Optional):
- ½ cup (120g) vegan butter, softened
- 2 cups (240g) powdered sugar
- 3 tablespoons cocoa powder
- 2-3 tablespoons plant milk
- 1 teaspoon vanilla extract
Alternative Binding Options (instead of flax eggs):
- 3 tablespoons chia seeds + 9 tablespoons water
- ¾ cup (180g) unsweetened applesauce
- ½ cup (120g) mashed banana (adds banana flavor)
- 6 tablespoons aquafaba (chickpea brine)
Instructions
Step 1: Prepare Your Flax Eggs
In a small bowl, combine the ground flaxseed with water and stir well with a fork. Set aside for 5-10 minutes to thicken and become gel-like, resembling the texture of beaten eggs. This flax “egg” provides binding that holds your brownies together. While the flax eggs set, preheat your oven to 350°F (175°C) and line an 8×8-inch or 9×9-inch square baking pan with parchment paper, leaving overhang on two sides for easy removal. Alternatively, grease the pan generously with vegan butter or oil. The parchment paper sling makes removing and cutting brownies infinitely easier.
Step 2: Mix Your Dry Ingredients
In a large mixing bowl, whisk together the flour, cocoa powder, sugar, baking powder, salt, and espresso powder if using. Whisk thoroughly for at least 30 seconds to ensure the cocoa powder is fully incorporated and no lumps remain. Cocoa powder can be stubborn and clumpy, so breaking up all lumps now prevents pockets of bitter cocoa or flour in your finished brownies. If you see clumps, press them against the side of the bowl with your whisk or pass the mixture through a fine-mesh sieve. The dry mixture should look uniform and evenly colored throughout.
Step 3: Combine Wet Ingredients
In a separate medium bowl, combine the thickened flax eggs, oil (or melted coconut oil or vegan butter), plant milk, vanilla extract, and coffee or water. Whisk together until well combined and slightly emulsified. The coffee is optional but highly recommended – it doesn’t make brownies taste like coffee; instead, it amplifies and deepens the chocolate flavor dramatically. If using melted coconut oil, ensure your plant milk is at room temperature; cold milk can cause the oil to solidify into clumps.
Step 4: Mix Wet and Dry Together
Pour the wet ingredients into the bowl with the dry ingredients. Using a spatula or wooden spoon (not a whisk, which can overmix), fold the ingredients together with gentle strokes. Mix just until no dry flour streaks remain – about 20-30 gentle folds. The batter will be thick and glossy. DO NOT OVERMIX! Overmixing develops gluten, which creates cakey rather than fudgy brownies. Some small lumps are fine. If adding chocolate chips or nuts, fold them in now with just a few additional strokes. Reserve a small handful of chocolate chips to press on top if desired.
Step 5: Pour Batter into Pan
Scrape the thick batter into your prepared pan, using a spatula to spread it evenly into all corners. The batter will be quite thick – this is correct! Don’t worry if it seems too thick; it will spread during baking. Use the back of your spatula to smooth the top surface as evenly as possible. If you reserved chocolate chips for the top, scatter them over the surface now and press them lightly into the batter. For swirled brownies, dollop peanut butter or caramel sauce on top and use a knife to create swirl patterns.
Step 6: Bake to Fudgy Perfection
Place the pan in your preheated 350°F (175°C) oven on the center rack. Bake for 25-30 minutes for an 8×8-inch pan, or 30-35 minutes for a 9×9-inch pan. The exact time depends on your oven and desired fudginess. Here’s the crucial part: for fudgy brownies, you want to SLIGHTLY UNDERBAKE them. The brownies are done when the edges look set and maybe slightly pulling away from the pan, the top has a shiny, slightly crackly appearance, but a toothpick inserted in the center comes out with a few moist crumbs (NOT clean, and NOT wet batter). If the toothpick comes out completely clean, you’ve overbaked and they’ll be cakey rather than fudgy.
Step 7: Cool Completely (This is Crucial!)
Remove the pan from the oven and place it on a wire cooling rack. Here’s where patience is absolutely essential: let the brownies cool COMPLETELY in the pan – this takes at least 1-2 hours at room temperature, or 30-45 minutes in the refrigerator. This cooling period is not optional! The brownies continue cooking slightly from residual heat and, more importantly, the texture sets properly during cooling. Cutting into warm brownies results in a gooey mess that falls apart. Fully cooled brownies slice cleanly and have that perfect fudgy texture. For fastest cooling, refrigerate for 30-45 minutes – chilled brownies actually slice even more cleanly.
Step 8: Remove and Cut
Once completely cool, use the parchment paper overhang to lift the entire brownie slab out of the pan and place it on a cutting board. If you greased the pan without parchment, run a knife around the edges first to loosen. For the cleanest cuts, use a large, sharp chef’s knife and wipe it clean with a damp cloth between each cut. Cut into 16 squares (4×4 grid) for standard-sized brownies, or 25 smaller squares for party-sized portions. For extra-clean edges, warm your knife under hot water, dry it, then make your cuts. The warmth helps the knife glide through without dragging.
Step 9: Optional Frosting
If making frosted brownies, wait until brownies are completely cool. Beat softened vegan butter with an electric mixer until creamy. Add powdered sugar, cocoa powder, plant milk, and vanilla. Beat on low speed until combined, then increase to high speed and beat for 2-3 minutes until light and fluffy. Spread evenly over cooled brownies, then cut into squares. Frosted brownies are extra decadent and impressive for special occasions.
Step 10: Store Properly
Store brownies in an airtight container at room temperature for up to 5 days, in the refrigerator for up to 10 days, or freeze for up to 3 months. Layer brownies between parchment paper to prevent sticking. Brownies actually taste even better the next day as flavors meld and texture becomes even fudgier. Bring refrigerated or frozen brownies to room temperature before serving for best texture, or warm briefly in the microwave (10-15 seconds) for that fresh-from-the-oven experience.
Ingredient Deep Dive
The type of cocoa powder dramatically affects your brownies’ flavor and appearance. Dutch-process cocoa powder (alkalized) has a darker color, milder flavor, and dissolves more easily in liquids – it creates brownies with deep, dark color and smooth chocolate taste. Natural cocoa powder is lighter in color, more acidic, and has more intense, slightly bitter chocolate flavor – it creates brownies with reddish-brown color and bolder taste. Both work beautifully in this recipe since it contains baking powder (which works with both types). For the deepest, darkest brownies, use Dutch-process; for more intense chocolate flavor, choose natural. Quality matters significantly – cheap cocoa powder can taste chalky and bitter. Brands like Valrhona, Guittard, or Ghirardelli produce superior results.
Flax eggs are the most popular egg replacer in vegan baking for good reason. Ground flaxseed mixed with water creates a gel that mimics egg’s binding properties. Golden flax produces lighter-colored brownies than brown flax, though the flavor difference is negligible. Pre-ground flax meal is convenient but loses potency over time; grinding whole flaxseeds in a coffee grinder just before use provides maximum binding power and nutrition. Store ground flaxseed in the freezer to prevent rancidity. The 1:3 ratio (1 tablespoon ground flax to 3 tablespoons water per “egg”) is standard. Chia eggs work similarly and create even thicker gel, though they’re more expensive and create brownies with visible seeds.
Oil selection impacts both texture and flavor. Neutral vegetable oil (canola, safflower, or grapeseed) creates the fudgiest brownies with longest shelf life and produces neutral flavor that lets chocolate shine. Melted coconut oil creates slightly firmer brownies (due to its solid state at room temperature) with subtle coconut flavor; use refined coconut oil for neutral taste or unrefined for coconut notes. Melted vegan butter creates richest flavor and most traditional brownie taste but shortens shelf life and creates slightly cakier texture. Olive oil works but imparts noticeable flavor that some enjoy in chocolate desserts while others find distracting.
Sugar type affects texture, moisture, and flavor. Granulated white sugar creates the crackly top and chewy texture characteristic of classic brownies. Coconut sugar or brown sugar creates denser, moister brownies with caramel notes but produces less shiny top. Date paste or maple syrup can replace some sugar for more natural sweetness, but these liquid sweeteners require reducing other liquids and create slightly different texture. For best results, use at least 50% granulated sugar to achieve that signature brownie texture and appearance.
Customization Options
Flavor Variations
Transform basic brownies into exciting flavor experiences. Create mint brownies by adding 1 teaspoon peppermint extract to the batter and folding in crushed vegan peppermint candies or Andes mints. Make Mexican chocolate brownies by adding 1 teaspoon cinnamon and ¼ teaspoon cayenne pepper for subtle heat and complexity. Try espresso brownies by increasing espresso powder to 1 tablespoon for intense coffee-chocolate flavor.
Make peanut butter swirl brownies by dolloping ½ cup peanut butter on top of the batter before baking and swirling with a knife – creates beautiful marbled pattern and amazing flavor combination. Create salted caramel brownies by drizzling vegan caramel sauce over batter before baking and sprinkling with flaky sea salt. Try orange chocolate brownies by adding 1 tablespoon orange zest and ½ teaspoon orange extract to the batter.
Texture Modifications
Adjust brownie texture to your preference. For even fudgier brownies, reduce flour to ¾ cup and add 2 tablespoons additional oil – this creates ultra-dense, almost truffle-like texture. For cakier brownies, increase flour to 1¼ cups and baking powder to ¾ teaspoon, and bake an extra 5 minutes. For chewy brownies, use brown sugar instead of white sugar and add 2 tablespoons corn syrup or maple syrup.
Create brownies with crispy edges and fudgy center by baking in a metal pan (conducts heat better than glass) and slightly underbaking the center. Make thin, crispy brownies by using a 9×13-inch pan instead of 8×8 or 9×9, and reducing baking time to 18-22 minutes. For gooey centers, remove from oven when toothpick has lots of wet crumbs clinging to it and refrigerate before cutting.
Serving Suggestions
Vegan brownies are incredibly versatile and delicious in numerous serving styles. Serve them classic-style at room temperature, simply cut into squares and arranged on a platter – perfect for potlucks, bake sales, or casual gatherings. The simplicity lets the chocolate flavor shine. Dust with powdered sugar just before serving for elegant presentation, or drizzle with melted vegan chocolate for extra decadence.
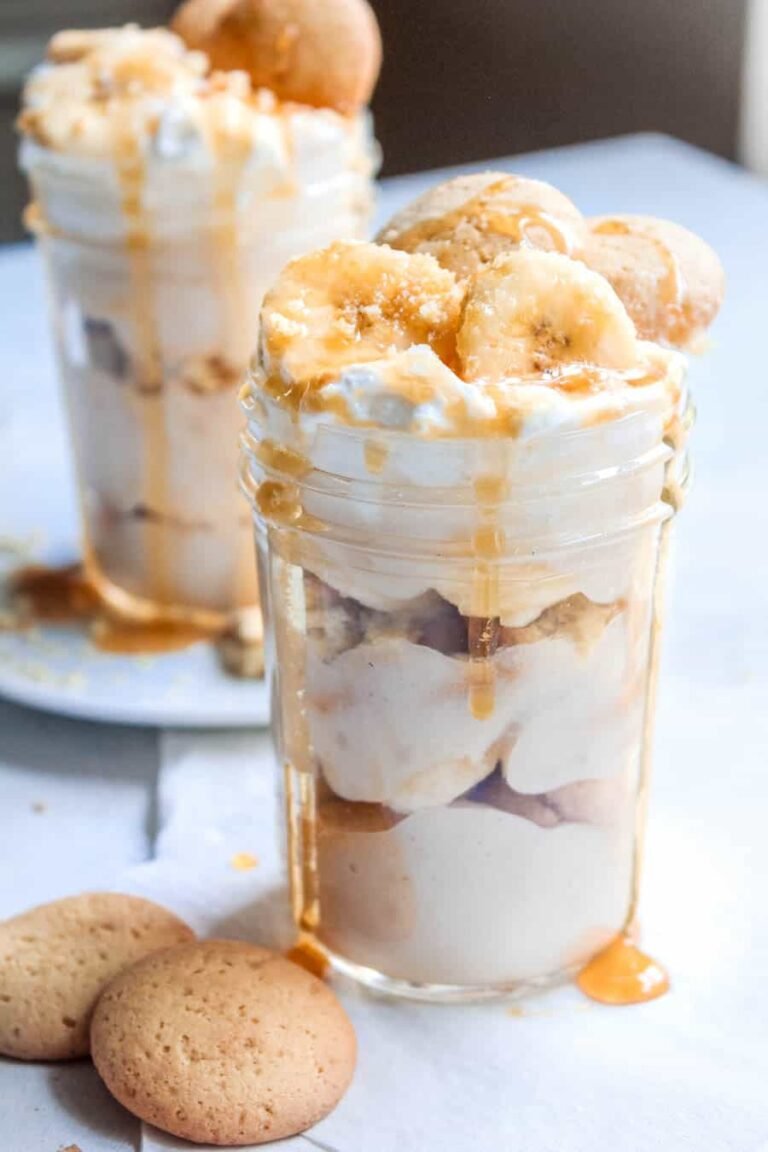
Create brownie sundaes by warming brownies slightly, topping with vegan vanilla ice cream, chocolate sauce, whipped coconut cream, and chopped nuts or cherries. This transforms brownies into restaurant-worthy desserts perfect for entertaining. Make brownie parfaits by crumbling brownies and layering with vegan pudding, whipped cream, and fresh berries in glasses for individual, portable desserts.
Serve brownies with coffee, tea, or cold plant milk for afternoon snacks or dessert. The richness pairs beautifully with the bitterness of coffee or the smoothness of milk. For special occasions, plate brownies individually with raspberry coulis, fresh berries, and mint garnish for elegant plated desserts. Create brownie ice cream sandwiches by sandwiching vegan ice cream between two brownies and rolling edges in mini chocolate chips.
Build brownie platters for parties with various brownie flavors and toppings, allowing guests to choose their favorites. Include plain, mint, peanut butter swirl, and salted caramel varieties. Provide toppings like vegan whipped cream, chocolate sauce, caramel, and fresh fruit so guests can customize. This interactive dessert station becomes a party centerpiece.
Variations
Once you’ve mastered classic brownies, creative variations keep things exciting. Make double chocolate brownies by adding 1 cup vegan chocolate chips to the batter for extreme chocolate intensity. Create blondies using the same technique but omitting cocoa powder, increasing flour to 1½ cups, and using brown sugar for caramel-vanilla flavor. Try red velvet brownies by reducing cocoa to ¼ cup, adding red food coloring, and topping with vegan cream cheese frosting.
Make brookies (brownie-cookies) by pressing chocolate chip cookie dough in the bottom of the pan, topping with brownie batter, and baking until both layers set. Create cheesecake brownies by swirling vegan cream cheese mixture (blend 8 oz vegan cream cheese with ¼ cup sugar and 1 tablespoon cornstarch) into the brownie batter before baking.
Try s’mores brownies by topping brownies with graham cracker pieces and vegan marshmallows during the last 5 minutes of baking, broiling briefly to toast. Make brownie bites by baking batter in mini muffin tins for 12-15 minutes – perfect for portion control and parties. Create raw brownies using dates, nuts, cocoa powder, and maple syrup processed in a food processor and pressed into a pan – no baking required.
Make protein brownies by adding ½ cup vegan protein powder (reduce flour to ½ cup) for post-workout treats. Try black bean brownies by processing cooked black beans until smooth and using in place of half the flour for fiber-rich, fudgy brownies with sneaky vegetables. Each variation maintains brownie satisfaction while offering completely different experiences.
Storage and Meal Prep
Brownies are excellent make-ahead desserts that actually improve after a day or two as flavors meld. Store completely cooled brownies in an airtight container at room temperature for up to 5 days – they stay moist and fudgy without refrigeration. For longer storage, refrigerate in an airtight container for up to 10 days. The cold firms them up; bring to room temperature before serving or warm briefly in the microwave (10 seconds) for softer texture.
For freezing, wrap individual brownies tightly in plastic wrap, then place in a freezer bag or container. Freeze for up to 3 months. Thaw at room temperature for 1-2 hours or microwave from frozen for 20-30 seconds. Frozen brownies are perfect for portion control – grab one whenever a chocolate craving hits. Frosted brownies freeze beautifully too; frost before freezing or frost after thawing.
Brownie batter can be made ahead and refrigerated for up to 24 hours before baking – let it come to room temperature (about 30 minutes) before baking, or add 5 minutes to baking time if baking cold. This make-ahead option reduces party stress. You can also freeze unbaked brownie batter in the pan, tightly wrapped, for up to 1 month; bake from frozen, adding 10-15 minutes to baking time.
For gift-giving, layer brownies between parchment paper in decorative tins or boxes. They ship well and make thoughtful homemade gifts. Create brownie mix in a jar by layering dry ingredients attractively – attach instructions for adding wet ingredients and baking. These DIY brownie mixes make excellent gifts that are both beautiful and practical.
Common Mistakes to Avoid
Overbaking: The number one mistake that ruins brownies! Overbaking creates dry, cakey brownies instead of fudgy ones. Remove brownies from the oven when a toothpick inserted in the center comes out with moist crumbs, NOT clean. The brownies continue cooking from residual heat after removal. It’s better to slightly underbake than overbake – you can always put them back in the oven, but you can’t un-bake them.
Cutting Too Soon: Slicing into hot or warm brownies creates a gooey mess that falls apart and loses that perfect fudgy texture. Cool brownies completely – at least 1-2 hours at room temperature or 30-45 minutes refrigerated. This patience pays off with clean slices and perfect texture. Use the refrigerator to speed cooling if you’re impatient.
Overmixing the Batter: Vigorously stirring or using an electric mixer overdevelops gluten, creating tough, cakey brownies instead of tender, fudgy ones. Mix wet and dry ingredients together with gentle folding motions just until combined. Some lumps are fine. The batter should be thick, not smooth and pourable.
Using Wrong Pan Size: Pan size dramatically affects baking time and texture. This recipe is designed for an 8×8 or 9×9-inch pan. Using a larger pan (like 9×13) creates thin brownies that overbake quickly; using a smaller pan creates thick brownies that underbake in the center. If you must use different size, adjust baking time accordingly and watch carefully.
Skipping Parchment Paper: Trying to remove brownies from a greased pan often results in stuck, broken brownies and frustration. Line your pan with parchment paper with overhang on two sides – this creates a sling that makes removal effortless. Alternatively, use a well-greased pan but be prepared for potential sticking.
Using Stale Leavening Agents: Old baking powder loses potency and won’t create proper rise or texture. Always check expiration dates on baking powder. Test baking powder by mixing ½ teaspoon with hot water – it should bubble vigorously. If not, replace it. Fresh leavening ensures proper texture.
Not Letting Flax Eggs Thicken: Adding flax and water directly to the batter without letting them gel first means your “eggs” won’t bind properly. Always let flax eggs sit for 5-10 minutes until thick and gel-like before using. This small step ensures proper binding and texture.
Shopping Guide
Most brownie ingredients are affordable pantry staples. All-purpose flour costs $3-5 for a 5-pound bag that makes many batches. Store in an airtight container in a cool, dry place for up to 8 months, or freeze for longer storage. Unsweetened cocoa powder is the most important ingredient to splurge on – quality cocoa creates dramatically better-tasting brownies. Premium cocoa (Valrhona, Guittard, Ghirardelli) costs $8-12 per container but lasts for many recipes and makes noticeable difference. Store cocoa in an airtight container away from heat and light.
Granulated sugar is inexpensive – a 4-pound bag costs $2-4 and makes multiple batches of brownies. Store in an airtight container away from moisture. Ground flaxseed meal costs $4-6 for a bag in the baking or cereal aisle, or buy whole flaxseeds ($3-5 per pound) and grind them yourself in a coffee grinder. Store ground flax in the freezer to prevent rancidity; it lasts indefinitely frozen.
Vegetable oil is economical – a bottle costs $3-5 and lasts for many baking projects. Buy whatever neutral oil is on sale. Coconut oil costs more ($6-10 per jar) but offers unique flavor and texture; look for it in the oil section or natural foods area. Vegan chocolate chips vary in price ($3-6 per bag); Enjoy Life and Lily’s are popular brands. Check ingredient lists as some “dark” chocolate contains milk – look for 60%+ cacao content that’s specifically labeled vegan or dairy-free.
Plant-based milk is affordable ($3-5 per half-gallon) and widely available – use whatever type you prefer, with store brands working just as well as expensive ones. Vanilla extract costs $4-8 per bottle; pure vanilla tastes better than imitation but both work. Baking powder costs $2-4 per container and lasts for many recipes – always check the expiration date.
Nutritional Information (Per Serving)
- Prep Time: 15 minutes
- Cook Time: 30 minutes
- Total Time: 2 hours 45 minutes (including cooling)
- Servings: 16 brownies
- Calories: 195 kcal per brownie
- Protein: 3g
- Carbohydrates: 28g
- Fat: 9g
- Fiber: 2g
- Sugar: 19g
- Sodium: 95mg
- Iron: 1.8mg
- Magnesium: 35mg