Crispy Vegan Waffles – Golden, Fluffy & Perfectly Plant-Based
Table of Contents
Introduction
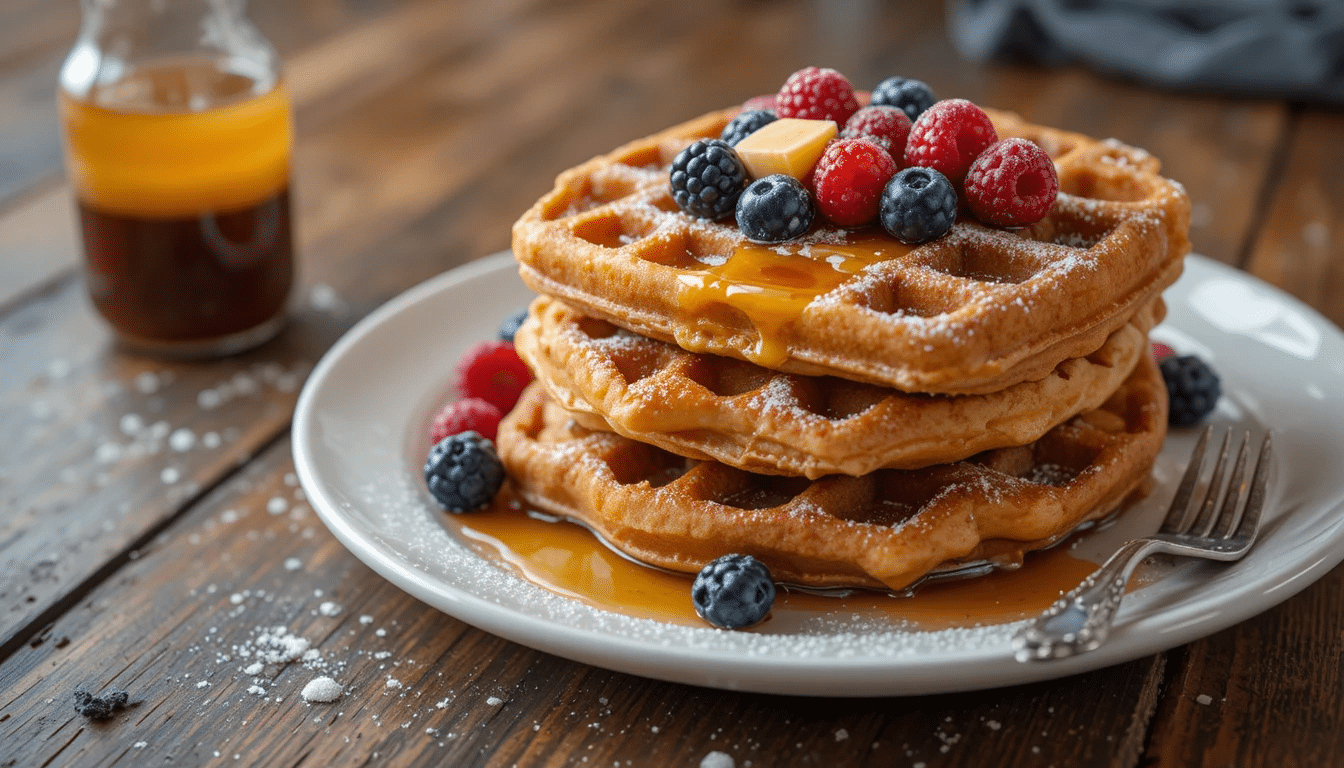
There’s something irresistible about the sound of a waffle iron closing on fresh batter, the steam rising as it cooks, and that first glimpse of golden-brown, crispy-edged perfection when you lift the lid. Vegan waffles deliver all the joy of traditional waffles – that satisfying crunch giving way to fluffy, tender interior, those signature deep pockets perfect for catching maple syrup – without any eggs or dairy. These aren’t compromise waffles or sad substitutes; they’re legitimately delicious breakfast treats that happen to be completely plant-based and often taste even better than their conventional counterparts.
What makes these vegan waffles truly special is their foolproof simplicity and incredible versatility. Using basic pantry ingredients and a straightforward mixing method, you can have fresh, hot waffles on the table in just 20 minutes. The secret lies in understanding how plant-based ingredients work together – the acidity of plant milk combined with vinegar creates lift, a touch of oil ensures crispiness, and proper batter consistency guarantees that perfect golden exterior. Whether you’re making breakfast for your family, hosting a weekend brunch, or treating yourself to something special on a weekday morning, these waffles deliver satisfaction in every bite.
The beauty of this recipe lies in its adaptability and crowd-pleasing appeal. Make them classic with just butter and syrup, or get creative with fresh fruit, nut butter, chocolate chips, or even savory toppings. The waffles freeze beautifully for quick weekday breakfasts – just pop them in the toaster for instant homemade goodness. They work equally well for breakfast, brunch, dessert, or even dinner when topped with savory ingredients. Once you’ve mastered this basic recipe, you’ll have a go-to breakfast that never disappoints and always impresses.
Cultural Background and Context
Waffles have a rich history dating back to ancient Greece, where cooks prepared flat cakes called “obleios” between two metal plates over an open fire. The honeycomb pattern we associate with modern waffles emerged in medieval Europe, particularly in the Low Countries (Belgium and the Netherlands), where craftsmen created ornate waffle irons with intricate designs including coats of arms, landscapes, and religious symbols. By the 14th century, street vendors sold waffles outside churches on religious holidays, and the treats became associated with celebrations and special occasions.
The waffle’s journey to America began with Dutch colonists in the 1620s, who brought their waffle irons and recipes to New Amsterdam (now New York). Thomas Jefferson reportedly encountered waffles during his time in France and brought a waffle iron back to America, helping popularize them among the upper classes. Waffles remained a special-occasion food until the 1930s, when electric waffle irons became common household appliances, transforming waffles into an everyday breakfast option. The rise of diners and breakfast restaurants in the 1950s cemented waffles as an American breakfast staple.
Traditional waffle recipes relied heavily on eggs for structure and lift, with butter and milk providing richness and flavor. The vegan adaptation of waffles represents both innovation and accessibility. Early plant-based attempts in the 1970s often resulted in dense, flavorless waffles that bore little resemblance to the crispy, fluffy originals. The breakthrough came when vegan cooks discovered that combining plant milk with an acid (like vinegar or lemon juice) creates a “vegan buttermilk” that reacts with baking powder to produce excellent lift.
Vegetable oil replaces butter’s moisture and promotes crispiness, while proper technique ensures golden exteriors. Today’s vegan waffles prove that compassionate cooking doesn’t mean sacrificing the foods we love – it means reimagining them in ways that are often healthier, more sustainable, and just as delicious.
Health Benefits
Heart-Healthy Breakfast: Vegan waffles are naturally cholesterol-free and significantly lower in saturated fat compared to traditional waffles made with eggs, butter, and whole milk. By using plant-based ingredients, you eliminate dietary cholesterol entirely while reducing saturated fat by up to 70%. This makes vegan waffles a heart-healthy choice that supports cardiovascular wellness. The use of vegetable oil provides healthy unsaturated fats that actually benefit heart health rather than compromising it.
Easier Digestion: Many people experience digestive discomfort from eggs and dairy, whether due to allergies, lactose intolerance, or general sensitivity. Vegan waffles eliminate these common digestive triggers while remaining just as satisfying and delicious. The absence of lactose makes them suitable for the majority of adults worldwide who have some degree of lactose intolerance. Plant-based ingredients are generally gentler on the digestive system, causing less bloating and discomfort than animal products.
Customizable Nutrition: Vegan waffles offer exceptional flexibility for enhancing nutritional value. Use whole wheat flour or oat flour for added fiber, minerals, and B vitamins. Add ground flaxseed or chia seeds to boost omega-3 fatty acids and protein. Incorporate mashed banana or pumpkin puree for extra vitamins and natural sweetness. Choose fortified plant milk to increase calcium, vitamin D, and B12. Top with fresh fruit for antioxidants and vitamins, or nut butter for protein and healthy fats. These modifications transform waffles from simple breakfast into genuinely nutritious fuel.
Blood Sugar Balance: When made with whole grain flour and topped with protein-rich ingredients like nut butter, vegan waffles provide a more balanced glycemic response compared to traditional waffles. The fiber content from whole grains and added seeds slows digestion and helps prevent blood sugar spikes and crashes. This sustained energy release keeps you focused and energized throughout your morning rather than experiencing the typical post-waffle slump.
Weight Management Support: Vegan waffles can be surprisingly filling while containing fewer calories than their butter-and-egg-laden counterparts. The elimination of high-calorie butter and eggs significantly reduces caloric density. When topped thoughtfully with fresh fruit rather than excessive syrup and whipped cream, vegan waffles become a reasonable breakfast choice even for those watching their weight. The fiber content (especially when using whole grain flour) promotes satiety and reduces overall calorie intake.
Allergy-Friendly: Vegan waffles are naturally egg-free and dairy-free, making them safe for people with these common food allergies. They can easily be made nut-free by choosing oat or rice milk instead of almond milk, and gluten-free by using a gluten-free flour blend. This inclusivity makes them perfect for serving groups with varied dietary restrictions – everyone can enjoy the same delicious breakfast without separate preparation or compromise.
Rich in Plant-Based Nutrients: Fortified plant milks provide significant amounts of calcium (often more than dairy milk), vitamin D, and vitamin B12 – nutrients of particular importance for those following plant-based diets. Whole grain flour contributes B vitamins, iron, and magnesium. Adding seeds or nuts increases protein, healthy fats, and minerals. These nutrients support energy metabolism, bone health, immune function, and overall vitality.
Calorie and Macronutrient Information: Two medium vegan waffles (without toppings) contain approximately 300-350 calories, providing a moderate-calorie breakfast. The macronutrient breakdown includes roughly 48-52g carbohydrates, 8-10g protein, and 10-12g fat (primarily healthy unsaturated fats), creating a reasonably balanced meal. Adding protein-rich toppings like nut butter or plant-based yogurt increases protein content significantly for a more complete breakfast.
Ingredients
For the Vegan Waffles (Makes 6-8 medium waffles):
Dry Ingredients:
- 2 cups (250g) all-purpose flour (or 1 cup all-purpose + 1 cup whole wheat flour)
- 2 tablespoons granulated sugar or coconut sugar
- 1 tablespoon baking powder
- ½ teaspoon baking soda
- ½ teaspoon salt
- 1 teaspoon ground cinnamon (optional)
Wet Ingredients:
- 1¾ cups (420ml) unsweetened plant-based milk (almond, soy, or oat)
- 1 tablespoon apple cider vinegar or lemon juice
- ⅓ cup (80ml) vegetable oil, melted coconut oil, or melted vegan butter
- 2 teaspoons vanilla extract
- 2 tablespoons maple syrup or agave nectar (optional, for sweeter waffles)
For Cooking:
- Cooking spray or additional oil for the waffle iron
For Flour Variations:
Whole Grain Options:
- Whole wheat flour (100% or mixed with all-purpose)
- Whole wheat pastry flour (lighter than regular whole wheat)
- Spelt flour (nutty flavor, light texture)
- Oat flour (gluten-free when certified)
Gluten-Free Options:
- Gluten-free all-purpose flour blend (1:1 substitution)
- Oat flour + almond flour combination
- Rice flour blends
For Classic Toppings:
Sweet Toppings:
- Pure maple syrup
- Fresh berries (strawberries, blueberries, raspberries, blackberries)
- Sliced bananas
- Powdered sugar
- Vegan butter
- Coconut whipped cream
- Chocolate chips or chocolate sauce
- Caramelized fruit
Protein-Rich Additions:
- Almond butter or peanut butter
- Cashew cream
- Vegan yogurt
- Hemp hearts
- Chopped nuts
Gourmet Options:
- Fresh fruit compote
- Lemon curd (vegan)
- Berry sauce
- Cinnamon sugar
- Toasted coconut
- Cacao nibs
For Savory Waffle Toppings:
- Avocado slices
- Sautéed mushrooms
- Vegan cream cheese
- Tomatoes and fresh herbs
- Vegan bacon or sausage
Instructions
Step 1: Prepare Your Vegan Buttermilk
In a large measuring cup or bowl, combine the plant-based milk and apple cider vinegar (or lemon juice). Stir gently and let the mixture sit undisturbed for 5-7 minutes while you prepare the other ingredients. During this time, the acid will curdle the milk slightly, creating a “vegan buttermilk” that’s essential for activating the leavening agents and creating tender, fluffy waffles. You’ll notice the milk thickens and may separate slightly – this is exactly what you want. This acidic base reacts with baking powder and baking soda to create carbon dioxide bubbles that make your waffles light and airy. Don’t skip this step; it’s crucial for achieving proper texture and rise.
Step 2: Mix Your Dry Ingredients
In a large mixing bowl, whisk together the flour, sugar, baking powder, baking soda, salt, and cinnamon if using. Whisk thoroughly for at least 30 seconds to ensure all the leavening agents are evenly distributed throughout the flour. This prevents pockets of baking powder or soda that could create uneven rising or bitter spots in your waffles. Breaking up any flour lumps now makes mixing easier later and results in smoother batter. The dry ingredients should look uniformly combined with no visible streaks or clumps. Set this bowl aside while you finish preparing the wet ingredients.
Step 3: Combine Wet Ingredients
Add the vegetable oil (or melted coconut oil or vegan butter), vanilla extract, and maple syrup if using to your curdled plant milk mixture. Whisk these wet ingredients together vigorously for 15-20 seconds until well combined and slightly frothy. The oil should be at room temperature or just barely warm – if it’s too hot, it could react with the baking powder prematurely. If using coconut oil, make sure it’s melted but not hot, or it may solidify when it hits the cold milk. The vanilla and optional maple syrup add flavor depth that makes these waffles special rather than just functional.
Step 4: Mix Wet and Dry Together
Create a well in the center of your dry ingredients and pour the wet mixture into it all at once. Using a wooden spoon, rubber spatula, or whisk, gently fold the ingredients together with broad, sweeping motions. Mix only until the flour is just moistened and you no longer see dry flour streaks – you should still see some small lumps throughout the batter. This typically takes about 15-20 gentle folds. DO NOT overmix! Overmixing develops gluten, which creates tough, chewy waffles instead of light, crispy ones. The batter should be thick but pourable, similar to thick pancake batter. If it seems too thick, add plant milk 1 tablespoon at a time; if too thin, add 1-2 tablespoons flour.
Step 5: Rest the Batter
Let your waffle batter rest for 5-10 minutes at room temperature while you preheat your waffle iron. This resting period is crucial for several reasons: it allows the flour to fully hydrate, creating better texture; it lets the leavening agents activate and create air bubbles; and it allows the gluten to relax, resulting in more tender waffles. You’ll notice the batter will thicken slightly and may develop bubbles on the surface – these are good signs indicating your leavening is working. Use this time to set the table, prepare toppings, and preheat your waffle iron. Do not stir the batter again after it has rested.
Step 6: Preheat Your Waffle Iron
Turn on your waffle iron to medium-high heat and let it preheat for at least 5 minutes – longer if your model has an indicator light. A properly preheated waffle iron is essential for crispy exteriors and properly cooked interiors. Most waffle irons have an indicator light that turns off when they’re ready, but even after the light goes off, wait an additional 1-2 minutes for maximum heat. Once hot, lightly spray or brush both the top and bottom plates with cooking spray or brush with melted vegan butter. Use oil spray specifically, as vegan butter can sometimes burn on direct high heat. Even if your waffle iron is non-stick, a light coating prevents sticking and promotes better browning.
Step 7: Pour and Cook Your First Waffle
Pour the appropriate amount of batter onto the center of the preheated waffle iron – usually ½ to ¾ cup depending on your waffle iron size (check your manufacturer’s instructions). Use a ladle or measuring cup for consistent portioning. Don’t overfill; the batter will spread and expand as it cooks. Close the lid gently but firmly and resist the urge to open it for at least 3-4 minutes.
Most waffle irons have a steam vent – when steam stops escaping vigorously, your waffle is usually done. If your iron has a ready indicator, wait for it to signal completion. The exact cooking time varies by waffle iron (3-6 minutes typically), but most waffles are done when steam production significantly decreases and the waffle is deep golden brown.
Step 8: Check for Doneness
Carefully open the waffle iron lid and check your waffle. It should be deep golden brown (almost caramel-colored) with crispy edges. If it’s pale or looks wet, close the lid and cook for another 30-60 seconds. The waffle should release easily from the iron – if it sticks or feels like it’s tearing, it needs more time. Properly cooked waffles will lift out cleanly with minimal resistance. Use a fork or silicone tongs (not metal, which can scratch non-stick coating) to carefully remove the waffle. Don’t force it; if it doesn’t want to release, it needs more cooking time.
Step 9: Keep Warm While Making Remaining Waffles
Transfer the cooked waffle to a wire cooling rack set on a baking sheet, then place the whole setup in a 200°F (95°C) oven to keep warm. The wire rack is important – placing waffles directly on a plate traps steam underneath, making the bottoms soggy. The low oven temperature keeps waffles warm and crispy while you cook the remaining batter. Alternatively, you can serve waffles immediately as they come off the iron, though this means some diners eat before others. Lightly re-spray the waffle iron between each waffle to prevent sticking and ensure consistent browning throughout your batch.
Step 10: Serve and Enjoy
Once all waffles are cooked, transfer them to serving plates. Serve immediately while they’re at their crispiest – waffles are best enjoyed fresh and hot. Top with your choice of toppings: a pat of vegan butter melting into the pockets, a generous drizzle of warm maple syrup, fresh berries scattered artistically, a dusting of powdered sugar, or a dollop of coconut whipped cream. For the best eating experience, pour syrup into the waffle pockets rather than over the entire surface – this prevents the bottom from becoming soggy. Encourage diners to eat promptly while the waffles maintain their crispy-outside, fluffy-inside texture perfection.
Ingredient Deep Dive
The choice of plant milk significantly impacts both flavor and texture in vegan waffles. Soy milk creates the richest, most substantial waffles with excellent browning due to its protein content (7-9g per cup). The protein helps create structure and promotes the Maillard reaction that gives waffles their golden color and toasted flavor.
Oat milk produces sweet, creamy waffles with great flavor and good crisping ability – it’s become many people’s favorite for waffles specifically. Almond milk creates lighter, less rich waffles with subtle nutty undertones; use it when you want a more delicate waffle. Coconut milk from a carton (not canned) adds gentle coconut flavor that pairs beautifully with tropical toppings and creates very crispy waffles due to its fat content.
The type and amount of fat dramatically affects waffle texture. Vegetable oil creates the crispiest waffles because liquid fat distributes evenly throughout the batter and doesn’t solidify during cooking. Melted coconut oil produces slightly less crispy but incredibly flavorful waffles with a hint of coconut taste (use refined for neutral flavor). Melted vegan butter creates rich, tender waffles with buttery flavor but slightly less crispiness than oil. The fat serves multiple purposes: it prevents sticking, promotes browning, creates tender crumb, and provides that satisfying richness we expect from waffles. Never skip the fat or replace it entirely with applesauce – you’ll get pale, tough, disappointing waffles.
Baking powder and baking soda work together to create the perfect rise and texture. Baking powder provides most of the lift through its double-action formula – it reacts twice, once when mixed with liquid and again when heated. Baking soda requires acid to activate (your vegan buttermilk provides this) and creates additional lift while helping waffles brown beautifully. Using both ensures maximum fluffiness, proper rise, and that characteristic golden color. Always check expiration dates on leavening agents; old baking powder or soda loses potency and results in flat, dense waffles. Test baking powder by mixing ½ teaspoon with hot water – it should bubble vigorously. If not, replace it.
Flour selection changes the character of your waffles entirely. All-purpose flour creates classic, tender waffles with neutral flavor and reliable texture. Bread flour (higher protein) produces chewier waffles with more structure – good if you like substantial texture. Whole wheat flour adds nutty flavor, fiber, and nutrients but creates denser, heavier waffles; use it for half the flour maximum, mixed with all-purpose for best results. Whole wheat pastry flour offers whole grain nutrition with lighter texture than regular whole wheat. For gluten-free waffles, use a commercial gluten-free flour blend specifically designed for baking (not just single flours like rice or almond) for best results. Each brand performs differently, so expect some trial and error.
Customization Options
Flavor Variations
Transform basic vegan waffles into exciting flavor experiences by adding ingredients to the batter. For chocolate waffles, add ¼ cup cocoa powder to the dry ingredients and increase sugar by 2 tablespoons. Fold in ½ cup vegan chocolate chips just before cooking for decadent double-chocolate waffles. Make lemon poppy seed waffles by adding 2 tablespoons lemon zest and 1 tablespoon poppy seeds to the batter – these pair beautifully with fresh berries.
Create pumpkin spice waffles by adding ½ cup pumpkin puree to the wet ingredients (reduce plant milk by ¼ cup) and 1½ teaspoons pumpkin pie spice to dry ingredients. These autumn-flavored waffles are perfect with pecans and maple syrup. For banana nut waffles, mash 1 ripe banana into the wet ingredients and fold in ½ cup chopped walnuts or pecans. Make blueberry waffles by gently folding ¾ cup fresh or frozen blueberries into the finished batter just before cooking.
Savory Waffle Options
Vegan waffles aren’t limited to sweet applications. Create savory versions perfect for brunch or dinner. Make herb and garlic waffles by omitting sugar, adding 2 tablespoons nutritional yeast, 1 teaspoon garlic powder, and 1 tablespoon dried herbs (rosemary, thyme, or Italian blend) to the dry ingredients. Top with sautéed mushrooms, tomatoes, avocado, and vegan sour cream for a savory meal.
Try cornmeal waffles by replacing ½ cup flour with cornmeal, reducing sugar to 1 tablespoon, and adding ¼ teaspoon black pepper. These pair wonderfully with vegan chili or black beans and salsa. Make everything bagel waffles by omitting cinnamon and sugar, adding 2 tablespoons everything bagel seasoning to the batter. Serve with vegan cream cheese, tomato, cucumber, and red onion for a bagel-inspired meal. Pizza waffles incorporate Italian seasoning and nutritional yeast, then top with marinara and vegan mozzarella for a fun dinner option.
Serving Suggestions
Classic vegan waffles shine with traditional accompaniments that let their crispy-fluffy texture be the star. Serve hot waffles stacked two or three high on plates, with a generous pat of vegan butter melting into the pockets. Dust with powdered sugar using a fine-mesh sieve for elegant presentation, drizzle with warm pure maple syrup, and arrange fresh berries artistically on top or alongside. This simple, timeless presentation never disappoints and allows the waffles themselves to shine.
For special occasions or indulgent weekend brunches, create elaborate waffle presentations. Make a berry compote by simmering mixed berries with maple syrup and a squeeze of lemon until jammy. Top waffles with this warm compote and coconut whipped cream for restaurant-quality results. Create banana foster waffles by caramelizing sliced bananas in vegan butter and brown sugar with a splash of rum extract, then spooning over waffles. Add toasted pecans and vegan vanilla ice cream for ultimate decadence.
Build a waffle bar for brunch gatherings by offering multiple topping options and letting guests customize their plates. Set out various syrups (maple, berry, chocolate), fresh fruits, nuts, seeds, nut butters, jams, vegan butter, chocolate chips, and whipped cream. Include both sweet and savory options to accommodate different preferences. This interactive setup makes breakfast engaging and ensures everyone gets exactly what they want.
Pair vegan waffles with complementary sides that round out the meal. Breakfast potatoes (hash browns or home fries) add savory balance. Vegan sausage or bacon provides protein and satisfying richness. Fresh fruit salad brings vitamins and refreshing contrast. A green smoothie adds vegetables and nutrients to balance the indulgence. Coffee, fresh orange juice, or herbal tea completes the breakfast experience.
Variations
Once you’ve mastered basic vegan waffles, creative variations keep breakfast exciting. Stuffed waffles take indulgence to new heights – spread vegan cream cheese or nut butter on one waffle, top with another, and press in the waffle iron briefly to seal. The filling melts slightly, creating pockets of creamy richness. Try fillings like chocolate hazelnut spread, peanut butter and banana, or berry jam with vegan cream cheese.
Waffle sandwiches transform breakfast into portable handheld meals. Use waffles instead of bread for breakfast sandwiches, filling them with tofu scramble, vegan sausage, avocado, and vegan cheese. For dessert waffles, make smaller waffles and sandwich vegan ice cream between them for DIY ice cream sandwiches. These freeze beautifully for quick frozen treats.
Belgian-style waffles require a Belgian waffle maker (with deeper pockets) and slightly thinner batter. Add an extra ¼ cup plant milk to this recipe for pourable batter that creates lighter, airier waffles. Liège waffles incorporate pearl sugar that caramelizes during cooking, creating candy-like pockets of sweetness throughout – fold 1 cup pearl sugar into the batter just before cooking.
Protein waffles boost nutritional value by adding ¼ cup vegan protein powder to the dry ingredients (reduce flour by ¼ cup) and increasing liquid by 2-3 tablespoons. These create substantial, filling waffles perfect for post-workout breakfasts. Oatmeal waffles blend ¾ cup oats until finely ground, then use as part of the flour for hearty, fiber-rich waffles with nutty flavor.
Storage and Meal Prep
Vegan waffles are exceptional for meal prep, making healthy breakfasts convenient even on the busiest weekday mornings. Cook a double or triple batch on Sunday, let waffles cool completely on a wire rack (about 30 minutes), then store in airtight containers in the refrigerator for up to 4 days. Reheat in a toaster or toaster oven for 3-5 minutes until crispy and hot. The toaster method is superior to microwaving, which creates soggy, rubbery waffles.
For longer storage, freeze waffles for up to 3 months. Cool waffles completely, then arrange in a single layer on a baking sheet and freeze until solid (about 2 hours). Transfer frozen waffles to freezer bags with parchment paper between them to prevent sticking, removing as much air as possible. This flash-freezing prevents waffles from freezing together, allowing you to remove just what you need. Reheat from frozen in a toaster for 4-6 minutes or in a 350°F oven for 8-10 minutes until crispy and heated through.
The batter can be made the night before and refrigerated in a covered bowl or jar, making morning preparation even faster. Whisk well before using as ingredients may settle or separate slightly overnight. The batter will thicken as it sits; add 2-3 tablespoons of plant milk to restore proper consistency before cooking. Fresh batter produces marginally better results, but pre-made batter saves precious morning minutes and works perfectly fine.
For ultimate efficiency, prep multiple components in advance: mix dry ingredients and store in an airtight container, measure liquids and refrigerate, and prepare toppings. In the morning, simply combine wet and dry ingredients, heat your waffle iron, and cook. This systematic approach makes gourmet waffles realistic even on busy weekdays when time is limited.
Common Mistakes to Avoid
Not Preheating the Waffle Iron Long Enough: The most common mistake is starting to cook before the waffle iron reaches proper temperature. Insufficient preheating creates pale, soggy waffles that stick. Always let your iron preheat for at least 5 minutes, even after the indicator light signals readiness. A properly hot iron creates steam that makes waffles crispy.
Overmixing the Batter: Vigorously stirring or whisking batter once wet and dry ingredients are combined develops excess gluten, creating tough, chewy waffles instead of tender, fluffy ones. Mix gently just until flour disappears. Lumps are fine and will disappear during cooking. If you can see individual flour streaks, keep mixing, but stop as soon as they’re gone.
Lifting the Lid Too Early: Opening the waffle iron before cooking completes causes waffles to tear apart and creates uneven cooking. Wait until steam production decreases significantly (or your indicator light signals completion) before checking. Most waffles need 4-5 minutes undisturbed. Patience prevents destroyed waffles and disappointing results.
Using Too Much or Too Little Batter: Overfilling causes overflow and messy cleanup; underfilling creates thin, crispy waffles without fluffy interiors. Follow your waffle iron manufacturer’s recommendations for batter amount (usually ½ to ¾ cup). The batter should spread to cover most of the grid but not overflow the edges.
Skipping the Vegan Buttermilk Step: Not letting plant milk curdle with acid prevents proper leavening and creates flat, dense waffles. The acidic base is essential for activating baking soda and creating tender texture. Always allow the full 5-7 minutes for the mixture to curdle and thicken before using.
Not Greasing the Iron Between Waffles: Even non-stick waffle irons benefit from light greasing between batches. Skipping this step causes sticking and uneven browning. Lightly spray or brush with oil after each waffle. This ensures consistent results throughout your batch.
Storing Hot Waffles Incorrectly: Stacking hot waffles directly on a plate traps steam underneath, making them soggy. Always use a wire rack in a low oven to keep waffles warm and crispy. The elevated rack allows air circulation that maintains texture while keeping waffles hot.
Shopping Guide
Most vegan waffle ingredients are affordable pantry staples. All-purpose flour is inexpensive and widely available – a 5-pound bag costs $3-5 and makes many batches of waffles. Buy from warehouse stores or bulk sections for best value. Store flour in an airtight container in a cool, dry place for up to 8 months, or freeze for longer storage. Baking powder and baking soda are essential; buy standard-size containers that last months. Always check expiration dates and replace when needed for best results.
Plant-based milk is the primary liquid ingredient. Buy whatever type you prefer or is on sale – oat and soy work best for waffles. A half-gallon costs $3-5 and makes multiple batches. Store brands work perfectly and cost $1-2 less than name brands with identical results. Shelf-stable varieties offer convenience and longer storage if you have pantry space.
Vegetable oil is the most economical fat option – a bottle costs $3-5 and lasts for months of cooking. Refined coconut oil provides neutral flavor at similar prices; unrefined adds coconut taste. Vegan butter costs more ($4-6 per container) but creates the richest-tasting waffles. Use whatever fat fits your budget and flavor preferences – all work well.
Pure maple syrup for topping is the most expensive component if using real maple syrup (Grade A Dark costs $8-15 per bottle). However, a bottle lasts for many servings and provides superior flavor. Budget-friendly pancake syrup works fine if cost is a concern, though it lacks real maple’s complex flavor. Agave nectar offers an alternative at similar prices.
For a waffle iron investment, basic models start at $15-25 and work perfectly fine. Mid-range options ($30-50) offer better non-stick coating and more consistent heating. High-end Belgian waffle makers ($60-100+) create thicker, fluffier waffles but aren’t necessary for delicious results. Any waffle iron, even budget models, produces great vegan waffles when used properly.
Nutritional Information (Per Serving)
- Prep Time: 10 minutes
- Cook Time: 20 minutes (for 8 waffles)
- Total Time: 30 minutes
- Servings: 8 medium waffles (serves 4, 2 waffles each)
- Calories: 310 kcal per serving (2 waffles without toppings)
- Protein: 7g
- Carbohydrates: 48g
- Fat: 11g
- Fiber: 2g
- Sugar: 6g (from added sweetener)
- Sodium: 420mg
- Calcium: 280mg (with fortified plant milk)
- Iron: 2.8mg
- Vitamin B12: 1.5mcg (with fortified plant milk)